Community Mapping Uganda

Welcome to Community Mapping Uganda!
Firstly, thankyou for taking part in mapping for Community Mapping Uganda , each feature we add to this map could mean a new limb for someone who has been injured by conflict, so this is a great way to spend some time! If you want to learn about our work before you get started, you can read about it here. Everything that you need to know about how to map is below. You have the choice of two videos: a short (5 min) version for those who want to get started quickly, and a longer (19 min) version for those who want more detail. Alternatively, there are detailed written instructions below the videos if you prefer. If you get stuck, you can refer to our Frequently Asked Questions for tips and answers to common questions that volunteers ask.
Short Instructional Video (5 mins):
If you get stuck, you can refer to our Frequently Asked Questions for tips and answers to common questions that volunteers ask.
Detailed Instructional Video (19 mins):
If you get stuck, you can refer to our Frequently Asked Questions for tips and answers to common questions that volunteers ask.
Written Instructions:
If you prefer written instructions, here they are:
OpenStreetMap
First things first, you need to sign up with OpenStreetMap (or just login if you already have an account). Here is how:
- If you are already a member of OpenStreetMap, click here to log in and do so. You can then skip the rest of this section.
- If you are not a member of OpenStreetMap, then click here to sign up (also top right of the screen)
- Fill in your details and click the Sign Up button at the bottom of the form, then accept the user agreement
- You will then be sent an email asking you to verify your account
- Click the link in the email and you are good to go!
This website
The main part of this website is a simple tool to help us coordinate the mapping effort. In simple terms, we have divided the whole area that we are working in (in Uganda) into squares, and we are going to map those squares one by one (to make sure no-one maps anything twice!). We ask volunteers to try to stick to their square, then get a new one when they have finished (rather than just keep going); but it doesn’t matter if you go out of your square a bit - so please don’t worry too much about it!
The mapping tool assigns you a green square, and lets you quickly assess whether or not it needs mapping, simply by comparing satellite imagery (right) to the current map (left).
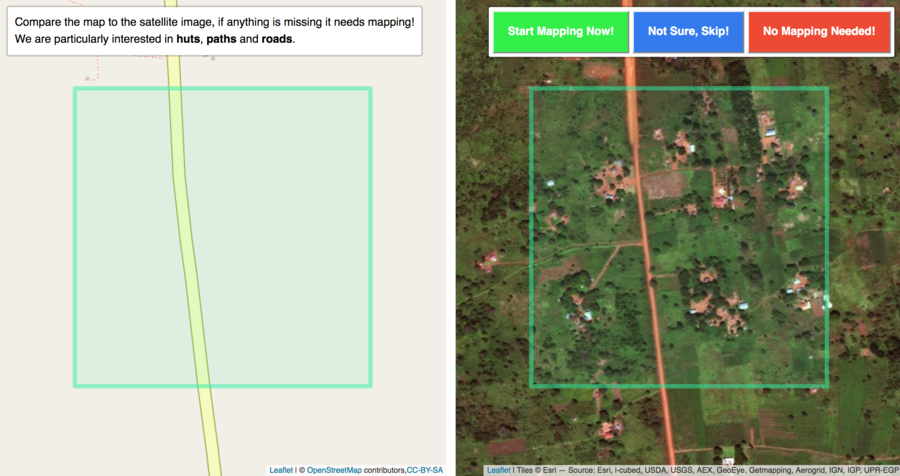
In order to maximise our potential to deliver prosthetic limbs to those who need them, we are particularly interested in mapping the following:
- Huts / Buildings
- Roads / Tracks / Paths
However, as you get more confident, you can map absolutely anything (railways, bstreams, rivers, lakes etc…). The more data we have, the easier it is for us to get help to those who need it!
If there is nothing to map, or it has all already been mapped (i.e. it appears on the map to the left), then you can press the red button, which will tell our database that this square has already been completed.
If you are not sure (e.g. there are clouds on the imagery, or you don’t feel like you can make it out), you can simply press the blue button to move on to a new square.
If you think that there is something in the green square for you to map, click the green button, and this will open the Map Editor so that you can map it!

Basically, the process is something like this:
- Look at green square, compare the satellite imagery to the OpenStreetMap, is there anything that needs mapping?
- Yes: Click Green Button
- No: Click Red Button
- Not Sure: Click Blue Button
Here are some examples:
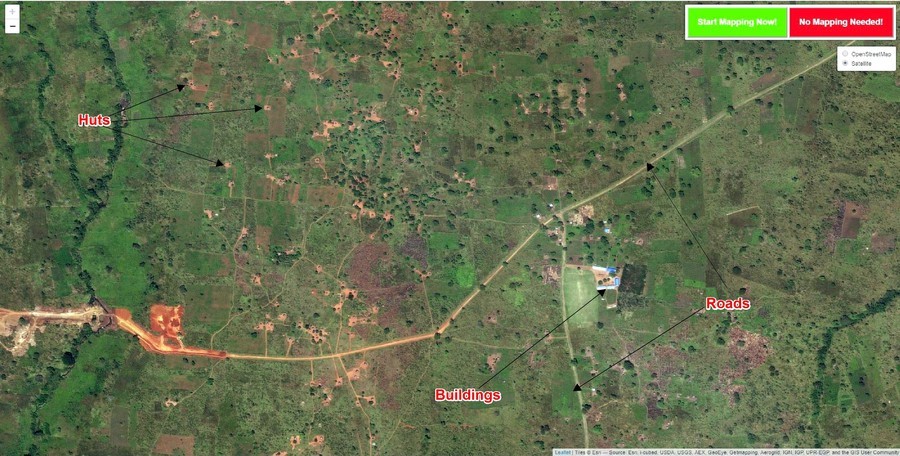
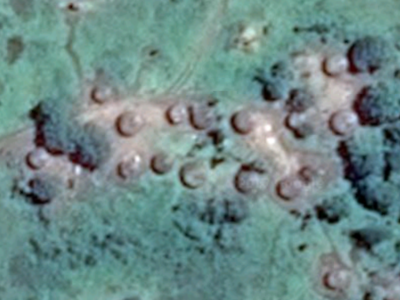
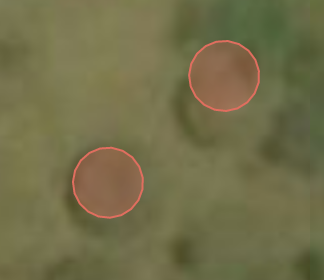
The huts can be particularly tricky to spot, so keep a good eye out!
Sometimes the areas will have been partially mapped, so maybe the roads have been added but not the buildings/huts. If you look at the map and think that it is incomplete then go for it!
Map Editor
If you have found features to map, and you have checked that they aren’t currently on OpenStreetMap and click the green button then a new tab will open in your browser containing OpenStreetMap’s Map Editor.
If it asks you to log in then do so, and you will then see a page like this:
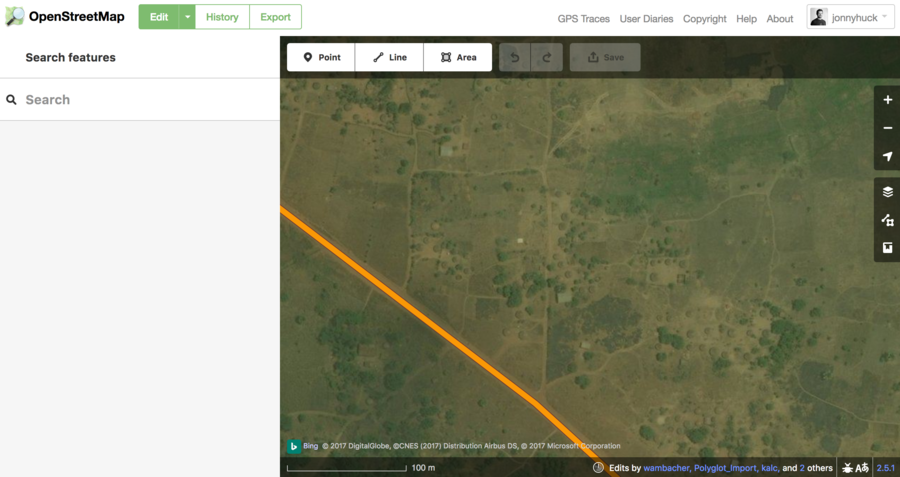
In this example the road has already been mapped but the huts and buildings have not. Let’s start by mapping the huts…
Mapping a hut
1: Zoom so you can see the huts clearly (it’s advisable to start in a corner and then work across from there so you don’t miss any).
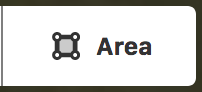
2: When you can see a hut clearly then click the Area button at the top of the map:
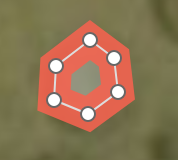
3: Click around the outside of the hut to make a rough circle that roughly matches the shape of the hut (it doesn’t need to be perfect, just roughly is fine!), then double click to finish:
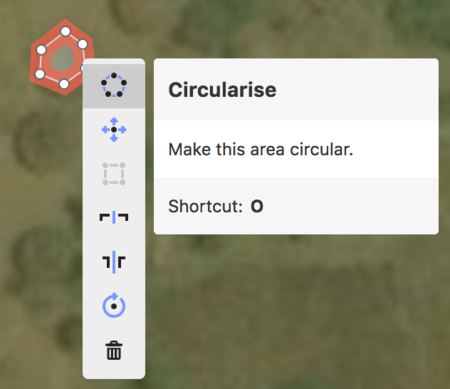
4: Right click on the middle of your circle and select Circularise - this will make it into a perfect circle!
5: On the left-hand tool bar there is a search box, type ‘Hut’ into that and then click the hut option that appears
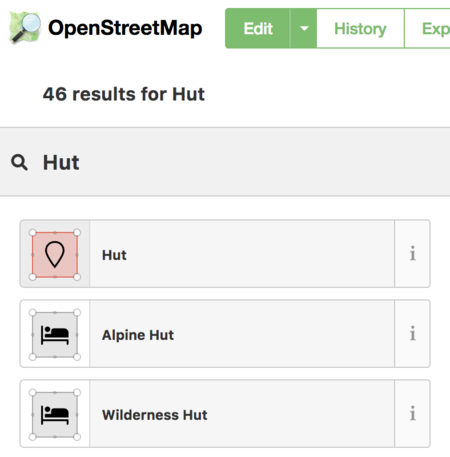
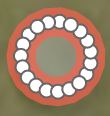
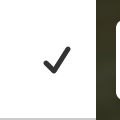
6: Once you have finished either click the tick icon that is just to the left of the point button (and under the Export button) or just click anywhere on the map. *Well done you have successfully mapped your first Hut! *
7: If there are several more huts of the same size, you can copy and paste that one by clicking on it (so it goes red with white dots around) and then pressing Ctrl+C then Ctrl+V on your keyboard. A new circular hut will then appear attached to your mouse pointer, and you can place it on the map by simply clicking where you want it. This allows you to quickly map all the huts in the village you have found, and saves you having to go through the above process again and again (but only use this for ones that are the same size!!).
Mapping a building
To map buildings, follow the same method but instead of using Circularise, use Square (to square off the corners). Simply follow the outline of the building and then select ‘Building’ instead of ‘Hut’ from the bar on the left.
Mapping a Road/Track
For ‘Roads’ and ‘Paths’ then you select the Line tool (instead of Polygon):

Simply draw along the line in the same way as you did with the huts (right click to finish). If at all possible, try to start and end each line by attaching it to another line (simply by clicking on the other line), as this gives us a joined up road and path network that we can use to help our clinics navigate through the region.
When you have drawn your like, in the left-hand bar, choose:
- Road if it looks like a main road (often tarmac surfaced, and normally wide enough for two vehicles)
- Track if it looks passable by a vehicle (normally a dirt surface, wide enough for one vehicle)
- Path if it only looks passable on foot (not wide enough for a vehicle)
If you aren’t sure which classification to use - this is perfectly okay - just make your best guess! Our volunteers will check the mapping that you have done, and our team in Uganda can always correct small errors like that when they see it in real life. It is far more valuable to us to have something there rather than nothing, even if the classification is slightly wrong!
Deleting mistakes
If you make a mistake and would like to delete what you have drawn then simply click on it so it goes red, right click on it and then click the bin icon.

Alternatively there is an undo button on at the top of the map (or just Ctrl+Z).

Saving your work!!!
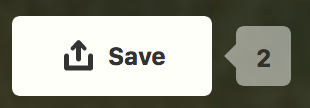
When you have mapped all the features in your area then it is time to save them to the OpenStreetMap database! To do this you click the Save button on the tool bar at the top of the map. The number next to it says how many things you have mapped!
This will make the map go grey and the bar on the left to look like this:
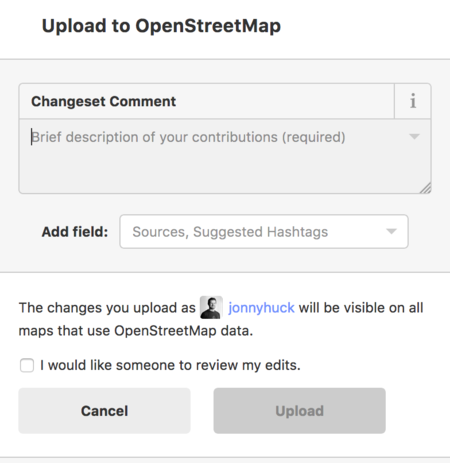
In the Changeset Comment type Community Mapping Uganda:
Giving up…
If you want to give up on a square, or weren’t able to finish, then that is absolutely fine - please just save any work that you have done (as above) then follow the instructions in the Back to Community Mapping Uganda section below so that we know to go back to that square.
Back to Community Mapping Uganda…
Well done and thank you, you have successfully mapped an area that has never been mapped before!! Now head back to the Community Mapping Uganda tab which will now have different buttons from the ones that you saw before:
- If you finished mapping your square then please click the big green button, this will mark it as ‘done’ in our database
- if you didn’t finish then please click the red button, this will mean it is given to someone else to complete later
Please make sure that you do this step - it only takes a second and is a massive help to us!

Either way, you will then be taken to a new square and you can start the process all over again (or you can simply leave the site if you are finished)!
If you get stuck, you can refer to our Frequently Asked Questions for tips and answers to common questions that volunteers ask.
Once again, thankyou again for taking part in Community Mapping Uganda - this is really important work that will change people’s lives for the better!